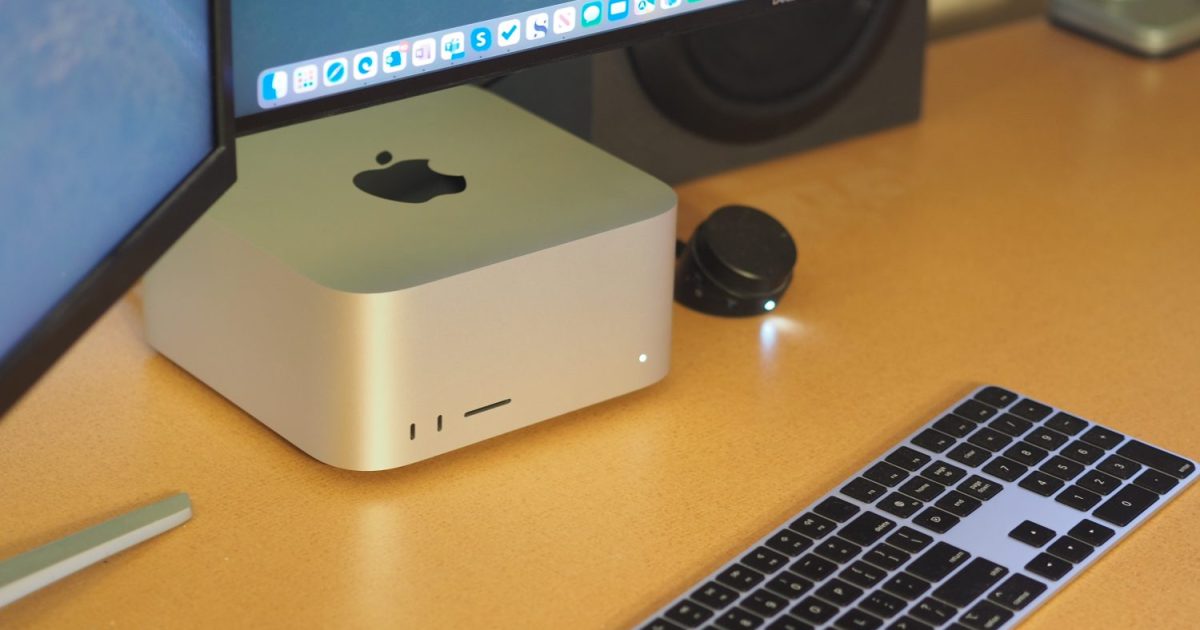
Apple’s Mac Studio is an elegantly designed desktop PC that matches into tight areas. It’s additionally one of many quietest desktops you’ll discover, making it an unobtrusive selection, whereas additionally offering surprisingly quick efficiency.
However whereas the Mac Studio gives first rate connectivity, it’s additionally a sealed enclosure with zero expandability. What you order is what you’ll have eternally, so selecting fastidiously when configuring your Mac Studio is significant. This information will show you how to make the fitting selections.
Specs and configurations
| Dimensions (HxWxD) | 3.7 x 7.7 x 7.7 inches |
| CPU/GPU | M2 Max 12-core CPU/30-core GPU M2 Max 12-core CPU/38-core GPU M2 Extremely 24-core CPU/60-core GPU M2 Extremely 24-core CPU/76-core GPU |
| Case | Apple CNC aluminum |
| Reminiscence | 32GB unified (M2 Max) 64GB unified 96GB unified (M2 Max 38-core GPU) 128GB unified (M2 Extremely) 192GB unified (M2 Extremely) |
| Storage | 512GB SSD (M2 Max) 1TB SSD 2TB SSD 4TB SSD 8TB SSD |
| Energy provide | Apple 370W |
| USB ports | Four x USB-C with Thunderbolt Four on rear 2 x USB-C on entrance (M2 Max) 2 x USB-C with Thunderbolt Four on entrance (M2 Extremely) 2 x USB-A on again 1 x HDMI 1 x 10GB Ethernet 3.5mm audio jack on again SD card reader on entrance |
| Wi-fi | Wi-Fi 6E, Bluetooth 5.3 |
| Value | $1,999-plus |
The Mac Studio is out there in two fundamental configurations, the M2 Max and M2 Extremely variations. I’ll get to efficiency under, however for now, let’s have a look at the pricing.
The M2 Max model begins at $1,999 with an M2 Max 12/30, 32GB of RAM, and a 512GB SSD. You may configure the M2 Max 12/38 model with as much as 96GB of RAM and an 8TB SSD, for $5,399.
The M2 Extremely Mac Studio is costlier, with a base value of $3,999 for an M2 Extremely 24/60, 64GB of RAM, and a 1TB SSD. Probably the most highly effective Mac Studio has an M2 Extremely 24/76, 192GB of RAM, and an 8TB SSD, costing a jaw-dropping $8,799.
Think about these costs as we talk about the variations between the assorted configurations.
M2 Max vs. M2 Extremely
We haven’t examined all configurations of the Mac Studio, so we will solely approximate efficiency. However that’s sufficient to present you an concept of the relative pace variations between the M2 Max and M2 Extremely.
Within the desk under, I exploit the MacBook Professional 14 M2 Max as a proxy for the M2 Max Mac Studio. The desktop will probably be quicker than the laptop computer, thanks to raised thermal efficiency. I listing the M2 Extremely with 60 GPU cores, so alter accordingly when fascinated by the model with 76 GPU cores.
As you may see, the 2 chipsets will carry out equally in single-core CPU duties, whereas the M2 Extremely will dramatically enhance on the M2 Max in multi-core purposes. Equally, the M2 Extremely has as many as twice the GPU cores, which means it will likely be considerably quicker in purposes that make the most of the GPU. This consists of gaming and purposes like these in Adobe’s Inventive Suite.
Productiveness customers gained’t discover as a lot distinction, due to this fact, as those that carry out demanding creativity duties.
| Cinebench 2024 single-core |
Cinebench 2024 multi-core |
Cinebench 2024 GPU |
Handbrake (in seconds) |
Geekbench 6 (single / multi) |
|
| Mac Studio (M2 Extremely 24/60) |
120 | 1,870 | 7,727 | 56 | 2,681 / 21,201 |
| MacBook Professional 14 (M2 Max 12/38) |
121 | 1032 | 5592 | 85 | 2,668 / 14,422 |
How a lot RAM and storage?
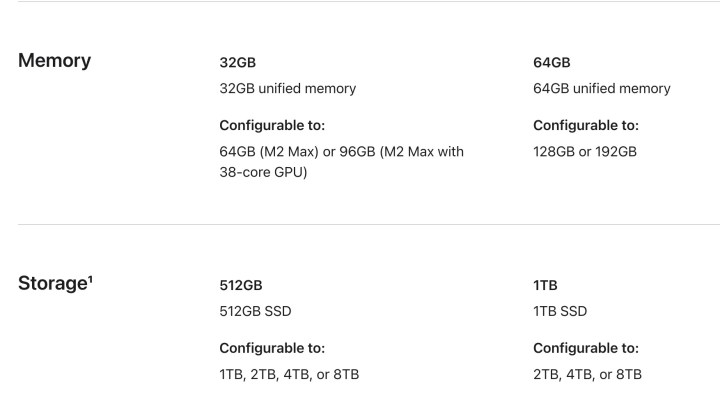
As talked about above, you gained’t be capable of improve RAM or storage. So, you’ll wish to configure your Mac Studio with as a lot RAM as you assume you’ll want. Apple Silicon machines use unified RAM, which means some is used for the CPU and a few for the GPU. The nice factor is that the minimal RAM you should purchase with a Mac Studio is 32GB, which is sufficient for many (however not all) productiveness customers.
However for those who’re knowledgeable creator who desires to eke out as a lot efficiency as doable, you’ll need as a lot RAM as doable. That’s why the M2 Extremely model, which is the chipset you’ll probably wish to select, could be configured with as much as a whopping 192GB of RAM. The M2 Max model can “solely” deal with 96GB for those who select the quickest M2 Max (64GB for those who select the bottom model).
Storage is one other consideration. All variations of the Mac Studio could be configured with between 1TB and 8TB of SSD storage, whereas the M2 Max model additionally gives a 512GB choice. Storage isn’t as crucial, although, as a result of you may all the time add exterior storage. Nonetheless, you’ll wish to think about how a lot high-speed storage you’ll require as a result of inner SSDs will all the time be quicker than these connected by way of ports.
What about connectivity?
There are two extra factors of consideration: show assist and what number of Thunderbolt Four ports you want. As you may think, the M2 Extremely mannequin has higher connectivity.
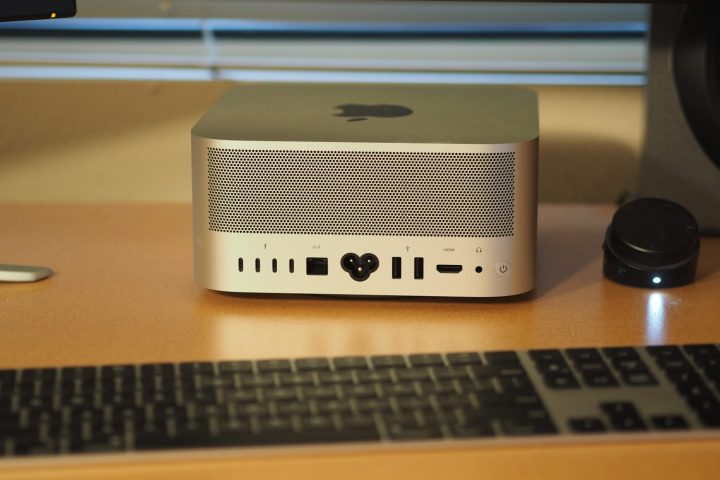
To start with, the M2 Max model has 4 USB-C ports with Thunderbolt Four assist on the again, with one other two USB-C ports on the entrance. With the M2 Extremely, all six USB-C ports assist Thunderbolt 4.

Extra importantly, although, the M2 Extremely mannequin helps extra shows. It’s difficult, however to place it merely, the M2 Extremely model helps as much as eight shows in varied combos. The M2 Max fashions assist as much as 5 shows. Discuss with Apple’s description above for the small print.
In each instances, most customers will discover the M2 Max mannequin offers greater than sufficient connectivity and show assist. However for those who’re within the minority and wish extra of both or each, then the M2 Extremely mannequin is for you.
And for those who can wait some time…
When you’re not in a rush to purchase a Mac Studio, you would possibly think about ready. The not too long ago launched M3 Max provides the M2 Extremely a run for its cash, and the M3 Extremely is prone to be even quicker but.
No one is aware of but when the Mac Studio will probably be upgraded with the newer chipsets, however it’s wanting prefer it will not be till the later a part of 2024. If in case you have a compelling cause to purchase a Mac Studio at this time, by all means accomplish that. However for those who can wait, you’re prone to take pleasure in an excellent quicker machine.
Editors’ Suggestions